

Well, it happened; I got the Diamond Painting Bug!!!
I saw some small Diamond Paintings at the Dollar Tree and had to pick one up to see if I liked it; sure enough, I did, and then went back for more. Then I bought a little bigger one, and the rest is history. I’m in love with doing them. I take my time with them and work on a little here and there. It takes me longer, but I like doing them this way. It relaxes me, and I don’t need to rush.
I haven’t tried to design my own yet, but I’m in the process of collecting some information to design my own. I think I’m going to give this a try and see if I can design my own. I think it will be kind of fun to design what I really want to do.
Here is some helpful information about designing your own custom diamond painting.
You can either order a comprehensive custom kit from a specialized company that manufactures everything from a photo, or build a complete DIY kit from scratch using free pattern-making tools and separate crafting supplies.
The two paths available to design a custom diamond painting include all the necessary steps, required tools, and choices:
Option 1: Order an All-In-One Custom Kit (Easiest)
An all-in-one provider simplifies the process by handling color mapping, printing the sticky symbol grid directly onto a high-quality fabric canvas, and packing the exact quantity of drills you need.
-
- The Design Process: You visit a reputable custom provider, upload a high-resolution photo (like a family portrait, pet, or landscape), select your canvas size, and choose your preferred drill shape. Many top brands will even offer a free digital preview or image enhancement to guarantee the pixelated result looks clear before production.
- What is Included in the Box:
-
- Pre-printed canvas with a poured-glue adhesive top layer and an HD color symbol chart.
- 100% resin diamond drills pre-sorted by color, bagged, and labeled with standard DMC color codes. Most companies package 30% extra drills to account for accidental spills.
- A standard tool toolkit, which typically features basic applicator pens, comfort grips, multi-placer tips, tweezers, a grooved sorting tray with a funnel, and wax caddies.
-
Top-Rated Custom Kit Providers

$30.00
Heartful Diamonds& more
Highly recommended for its premium anti-crease soft felt canvas and eco-friendly resin drills that offer superior light reflection. Kits start around $29 to $30 for smaller 12×12″ sizes and scale up to detailed XXL murals.

$79.95
DIY Art Club United States& more
Features an intuitive on-site cropping and sizing widget that updates your design preview instantly as you switch between layout sizes and drill options. A popular 20×24″ square-drill option runs around $80.
Dreamer Designs Custom Kit
Prized in the community for high-end “Dreamer Cloud” canvases, exceptionally clear high-definition symbol printing, and comprehensive toolkits featuring dual stylus pens and straighteners. Kits start at approximately $60.
Option 2: Map Your Own Pattern & Source Materials (Full DIY)
If you want absolute control over the design or prefer to use up an extensive stash of leftover diamond drills, you can manage the entire chart-mapping and canvas-building process independently.
-
- Step 1: Map the Chart Symbol Grid
To convert an image into a structured grid pattern, upload your photo to a dedicated browser tool like MakeBead or StitchMate. These free tools map each pixel to standard DMC diamond drill codes, let you adjust the color-count slider to manage complexity, and export a printable multi-page PDF symbol chart with an exact drill-count inventory key. - Step 2: Assemble Your Canvas
Print your exported symbol chart using a home printer. To build an active sticky surface, affix an A4 or A5 double-sided adhesive sheet straight over the printed paper pattern. Peel back the protective top layer of the adhesive sheet bit by bit to stick down your diamonds as you work. For a sturdier workspace, tape or glue your paper chart onto a rigid piece of matboard or cardstock backing. - Step 3: Source or Organize Your Drills
If you don’t already have loose drills organized by color from previous projects, you can purchase individual color bags sorted by DMC code from online retailers like DiamondDrillsUSA or in bulk listings on marketplaces like AliExpress.
- Step 1: Map the Chart Symbol Grid
Important Design Considerations
Whether ordering a kit or printing your own, keep these core factors in mind to guarantee a successful final project:
-
- Image Resolution and Contrast: A high-contrast photo with a clear, prominent subject yields a far better pixel transition than an image full of dark shadows, direct sunlight blurs, or busy background details.
- Canvas Size vs. Detail: Because each diamond represents a single pixel, small canvases (like 30x30cm) cannot handle complex images or text without looking muddy and blurred. Keep small canvases reserved for simple, single-subject designs, and choose larger canvases for intricate photos.
- Square vs. Round Drills: Round drills are highly recommended for beginners because they are faster to place and forgiving if slightly askew, though small slivers of the canvas grid stay visible between them. Square drills require precise alignment with a tool or tweezers but fit flush against each other for a solid, gap-free, “mosaic” finish.
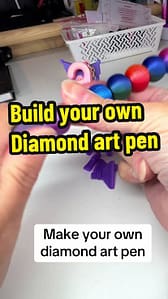
Here is a video showing you how to make your own diamond painting.
HOW TO Make Your Own DIY Diamond Painting! TUTORIAL.
Unleash Your Creative Vision
Stepping away from pre-packaged kits opens up a whole new world of creative freedom. By mastering the simple math of pixel resolution, leveraging powerful free design tools like Stitch Fiddle, and sourcing premium canvas and individual DMC drills, you can turn any visual concept into a breathtaking, textured piece of shimmering mosaic art.
It takes a little extra planning and preparation, but watching an image entirely of your own choosing come to life bead-by-bead makes it all worthwhile.


